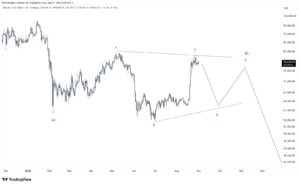
Triangle
Contracting · Expanding · Barrier · Running · Rules, Guidelines & Trading Applications
A triangle is a sideways corrective pattern consisting of five waves (A-B-C-D-E), each subdividing into three waves (3-3-3-3-3). Triangles appear in Wave 4, Wave B, or Wave X positions and reflect a temporary balance between buyers and sellers before the trend resumes — typically followed by a swift thrust in the direction of the larger trend.
What is an Elliott Wave Triangle?
A triangle is a sideways corrective pattern consisting of five waves (A-B-C-D-E), each subdividing into three waves (3-3-3-3-3). Triangles appear in Wave 4, Wave B, or Wave X positions and reflect a temporary balance between buyers and sellers before the trend resumes — typically followed by a swift thrust in the direction of the larger trend.
Triangle Structure: A-B-C-D-E Breakdown
| Wave | Structure | Direction | Characteristic |
|---|---|---|---|
| Wave A | 3-wave (a-b-c) | Against trend | Starts the sideways range |
| Wave B | 3-wave (a-b-c) | Against Wave A | Defines the upper boundary trendline |
| Wave C | 3-wave (a-b-c) | Same as Wave A | Must be shorter than Wave B |
| Wave D | 3-wave (a-b-c) | Against Wave C | Must be shorter than Wave C |
| Wave E | 3-wave (a-b-c) | Same as Wave C | Final wave before thrust; often ends near apex |
Four Types of Triangles
1. Contracting (Most Common ~80%)
Shape: Both trendlines converge toward apex
Rule: B < A, C < B, D < C, E < D
Thrust: Equal to widest part (Wave A height)
2. Barrier (Horizontal ~10%)
Shape: One trendline flat, other converges to it
Rule: Wave B and Wave D share the same price level
Thrust: Equal to height of Wave A
3. Expanding (Reverse ~8%)
Shape: Both trendlines diverge — each wave extends further
Rule: B > A, C > B, D > C, E > D
Thrust: Measure the widest span
4. Running (Irregular ~2%)
Shape: Wave B exceeds start of Wave A
Rule: Waves C, D, E remain within trendlines
Signal: Trend is very strong — powerful thrust follows
Official Triangle Rules
Rule 1: All Waves Subdivide into 3
✓ Every wave (A, B, C, D, E) MUST be a 3-wave structure
✓ No wave can be a 5-wave impulse
✗ If any wave has 5 sub-waves, it is NOT a triangle
Rule 2: Contracting Wave Sequence
✓ Wave C must be shorter than Wave B
✓ Wave D must be shorter than Wave C
✓ Wave E must be shorter than Wave D
✗ Wave E cannot exceed the end of Wave C
Rule 3: Position in Larger Structure
✓ Triangles ONLY appear in Wave 4, Wave B, or Wave X
✗ Triangles CANNOT appear in Wave 2 or Wave A positions
✗ Wave 2 of a triangle sub-wave cannot itself be a triangle
Rule 4: The Post-Triangle Thrust
✓ A thrust ALWAYS follows a triangle
✓ Thrust length ≈ widest part of triangle (Wave A height)
✓ Thrust is typically swift and sharp — the "last gasp" of the trend
Fibonacci Relationships in Triangles
Wave Relationships Within the Triangle
| Wave | Typical Fib of Prior Wave | Frequency | Notes |
|---|---|---|---|
| Wave B of A | 61.8%–78.6% of Wave A | 60% | Sets the retracement range |
| Wave C of B | 61.8%–78.6% of Wave B | 65% | Decreasing amplitude confirms contraction |
| Wave D of C | 61.8%–78.6% of Wave C | 65% | Pattern tightening toward apex |
| Wave E of D | 61.8%–78.6% of Wave D | 70% | Final wave; often slightly overshoots trendline |
Thrust Target After Triangle Completion
| Projection Method | Target | Frequency | Notes |
|---|---|---|---|
| 100% of Wave A height | Full thrust | 55% | Most common thrust target |
| 61.8% of Wave A | Short thrust | 20% | Often near end of larger correction |
| 123.6%–138.2% of Wave A | Extended thrust | 25% | When triangle is in Wave 4 of a strong impulse |
Trading Triangle Patterns
Setup 1: Trade the Thrust After Wave E
The highest-probability trade — enter at Wave E completion, targeting the post-triangle thrust.
| Entry | At Wave E completion, on break of Wave D high (bullish) or low (bearish) |
| Target | 100% of Wave A height added from Wave E end |
| Stop | Beyond Wave E extreme (invalidation level) |
| Confirmation | Price breaks the B-D trendline aggressively with momentum |
Setup 2: Fade Wave E at Trendline
Enter at Wave E as it touches the A-C trendline, anticipating the reversal back toward D before the thrust begins.
| Entry | At Wave E touch of the A-C trendline |
| Target | B-D trendline (thrust start zone) |
| Stop | Beyond Wave C extreme |
| Risk | Wave E can overshoot trendline — leave a small buffer on stops |
Triangle Identification Checklist
- Does the pattern have exactly 5 waves (A-B-C-D-E)?
- Does each wave subdivide into 3 waves?
- Are both trendlines (A-C and B-D) clearly identifiable?
- Is the pattern appearing in Wave 4, B, or X position?
- For contracting: is each wave shorter than the previous?
- Does Wave E end near the apex of the trendlines?
- Is there a clear thrust following Wave E completion?
- Does the thrust approximately equal Wave A height?
- No 5-wave subdivisions in any internal wave of the triangle
Common Triangle Mistakes to Avoid
✗ Mistake 1: Labelling a triangle in Wave 2 or Wave A positions.
✓ Fix: Triangles ONLY occur in Wave 4, B, or X. If it is in Wave 2, it is a flat or zigzag.
✗ Mistake 2: Treating a 5-wave sub-wave as part of a triangle.
✓ Fix: All triangle sub-waves MUST be 3-wave structures. A 5-wave sub-wave disqualifies the pattern entirely.
✗ Mistake 3: Entering the thrust before Wave E touches the trendline.
✓ Fix: Wait for Wave E to test the A-C trendline before entering the thrust trade.
✗ Mistake 4: Setting a thrust target that is too conservative.
✓ Fix: Use the widest point of the triangle (Wave A span) as your minimum projection.
✗ Mistake 5: Ignoring Wave E overshoot.
✓ Fix: Wave E commonly overshoots the trendline slightly — use a buffer on stops to avoid being stopped out prematurely.
Real Example: XAUUSD Contracting Triangle (Wave 4)
Gold completes Wave 3 impulse at 3,500, then enters a Wave 4 contracting triangle.
| Wave | Structure | Price Level | Fib Notes |
|---|---|---|---|
| Wave A | 3-wave down | 3,500 → 3,320 (180 pts) | Initiates the range |
| Wave B | 3-wave up | 3,320 → 3,432 (112 pts) | 62.2% of Wave A ✓ |
| Wave C | 3-wave down | 3,432 → 3,363 (69 pts) | 61.6% of Wave B ✓ |
| Wave D | 3-wave up | 3,363 → 3,406 (43 pts) | 62.3% of Wave C ✓ |
| Wave E | 3-wave down | 3,406 → 3,380 (26 pts) | 60.5% of Wave D ✓ |
Trade Plan — Post-Triangle Thrust
1. BUY at 3,382 (Wave E completion + break of Wave D high)
2. Target: 3,382 + 180 pts = 3,562 (100% of Wave A height)
3. Stop: Below 3,374 (Wave E low)
4. R/R: 180 pts / 8 pts = 22.5:1 ✓
Quick Reference: Triangle Essentials
- Structure: 5 waves (A-B-C-D-E), each subdividing into 3 waves (3-3-3-3-3)
- Position: Wave 4, Wave B, or Wave X ONLY — never Wave 2 or Wave A
- Types: Contracting (most common) · Barrier · Expanding · Running
- Fib: Each wave approximately 61.8–78.6% of the prior wave
- Thrust Target: 100% of Wave A height from Wave E completion
- Key Rule: All sub-waves must be 3-wave structures — no exceptions
Real examples from EWI's counts
Finished triangle structures from our house count, measured from the recorded prices.